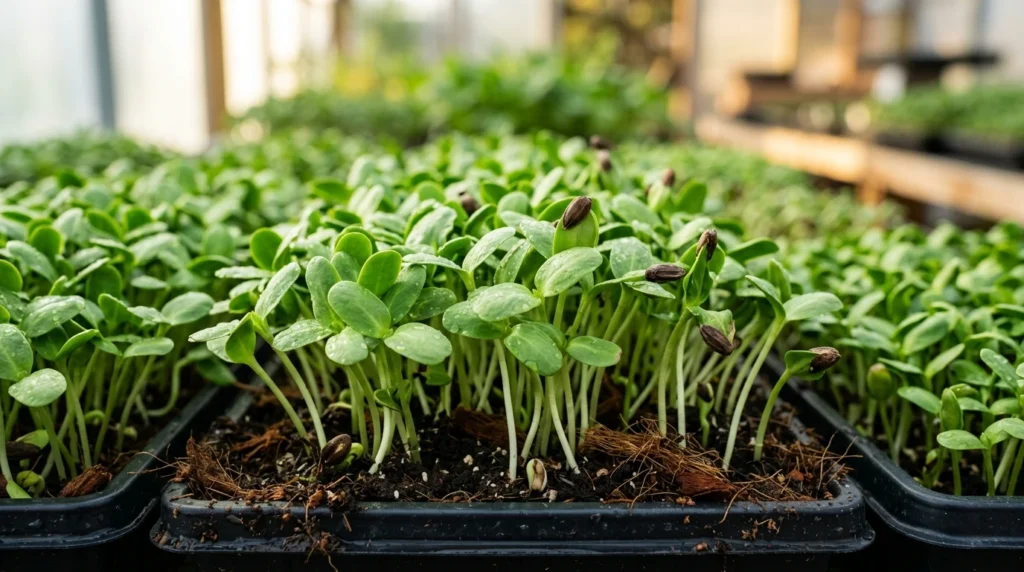
Recommended System: Commercial Microgreen Gear
Commercial BPA-free shallow propagation trays and full-spectrum LED rack systems for high-yield mold-free microgreens.
Nutritional profile and flavor characteristics
Sunflower microgreens (Helianthus annuus) rank among the most popular and commercially viable crops in modern indoor horticulture. Unlike delicate brassica microgreens, sunflower shoots develop thick, succulent stems and broad, fleshy cotyledons that deliver a crisp, nutty crunch reminiscent of raw sunflower kernels. Their substantial physical heft makes them an exceptional base green for salads, an elevated garnish for roasted meats, and a nutrient-dense addition to smoothies.
From an agronomic perspective, sunflower microgreens are highly productive, yielding between 450 and 650 grams (1 to 1.5 pounds) of cut greens per standard 1020 nursery tray in an 8 to 10-day production cycle. They provide substantial concentrations of complete plant protein (up to 25% by dry weight), essential amino acids, vitamin E, B-complex vitamins, zinc, iron, and chlorophyll. However, their thick seed hulls and dense stem clusters require disciplined adherence to soaking, sanitation, and weighted germination protocols to prevent fungal pathogens and stubborn hull adhesion.
Seed selection, sanitizing, and 8 to 12-hour soaking protocol
Always procure certified organic, pathogen-tested black oil sunflower seeds specifically intended for sprouting and microgreen cultivation. Confectionery sunflower seeds or seeds packaged for wild bird feed frequently exhibit poor germination rates, uneven growth, and high rates of seed-borne mold spores (including Aspergillus and Rhizopus).
Due to the thick, woody pericarp (hull) surrounding the seed kernel, sunflower seeds require a mandatory pre-soak to break seed dormancy and hydrate the embryo:
- Sanitizing Rinse: Measure 100 to 125 grams of dry seed per standard 1020 flat. Submerge the seeds in a food-safe sanitizing bath of cold water mixed with 15 ml (1 tablespoon) of 3% food-grade hydrogen peroxide for 10 minutes. Swirl vigorously to dislodge surface dust and fungal spores, then discard any hollow seeds that float to the top.
- Cold Water Soak: Rinse the seeds thoroughly with cold, filtered tap water. Place them in a clean container and submerge them under 3 to 4 times their volume in fresh water. Allow them to soak at ambient room temperature (18 to 21°C / 64 to 70°F) for 8 to 12 hours. Never exceed 14 hours of soaking; prolonged submersion suffocates the embryo and accelerates anaerobic bacterial decay.
- Rinse and Drain: Pour the soaked seeds into a colander and rinse thoroughly under running water until the runoff is crystal clear. Allow the seeds to drain for 15 minutes before sowing. The seeds will have expanded in volume by approximately 50% and are primed for rapid radical root emergence.
Growing medium comparison: potting soil vs. hydroponic grow mats
Sunflower microgreens possess vigorous, aggressive taproots that seek physical anchor and moisture. Choosing the proper substrate affects yield, root anchorage, and ease of harvest.
| Substrate medium | Yield per 1020 tray | Moisture retention | Root anchor stability | Cleanup effort |
|---|---|---|---|---|
| Fine Peat / Coco Seed Mix | 550 to 650 grams | High (superb capillary action) | Excellent (deep taproot grip) | Moderate (soil disposal needed) |
| 100% Buffered Coco Coir | 500 to 600 grams | High (uniform drying curve) | High (clean root penetration) | Low (compostable block) |
| Woven Jute / Hemp Mats | 400 to 480 grams | Moderate (dries faster) | Moderate (slight lateral slip) | Minimal (roll and discard) |
| Reusable Mesh / Biostrate | 380 to 450 grams | Low (requires frequent dosing) | Fair (shallow anchoring) | Low (mesh cleaning required) |
For home growers and commercial producers seeking maximum stem caliper and weight, a peat-based seed starting mix or fine buffered coco coir provides the best balance. The organic matter cushions root hairs and supplies slight trace mineral content that improves leaf color and sweetness.
Seeding density, stacking, and weighted blackout protocol
Proper density and physical top pressure represent the most critical steps in sunflower cultivation. Insufficient pressure allows seedlings to push upward unevenly, trapping tough seed hulls on the cotyledons. Excessive density restricts air circulation around lower stems, inducing damping-off disease.
Follow this exact seeding and blackout sequence:
- Prepare the Tray: Fill a 1020 nursery tray with drainage holes with approximately 1.5 to 2 inches of moist growing medium. Level the surface smoothly with a flat board. Mist the substrate with clean water until damp but not waterlogged (target 65% moisture capacity).
- Broadcast Sowing: Scatter the soaked 100 to 125 grams of drained seeds evenly across the surface. Ensure seeds form a uniform single layer edge-to-edge with minimal overlapping. Gently press the seeds into the surface using a clean second tray.
- The Weighted Blackout: Place an empty 1020 tray directly on top of the seeds (rim facing upward). Inside the top tray, place a 1kg to 2kg weight—such as a masonry brick, a paver, or a 2-liter water jug. This weight forces the emerging radical roots to drill deep into the medium rather than lifting the seed hulls off the soil.
- Germination Window: Keep the stacked trays in a dark area maintained at 20 to 22°C (68 to 72°F) for 3 to 4 days. Check once daily: if the soil surface appears dry, lightly mist with clean water. By day 3 or 4, hundreds of pale yellow stems will physically lift the weighted tray 1 to 2 inches. Once roots are firmly established and stems measure 1 to 1.5 inches tall, remove the weight and blackout lid.
LED lighting schedule, DLI targets, and bottom-watering
Upon uncovering, the seedlings will appear pale yellow with compact cotyledons. Within 12 to 24 hours of light exposure, photosynthesis activates chlorophyll production, transforming the canopy into vibrant forest green.
Maintain these precise environmental parameters:
- Daily Light Integral (DLI): Provide a target DLI of 14 to 16 mol/m²/d. Position full-spectrum white LED fixtures (3500K to 4000K) 8 to 12 inches above the canopy, delivering a Photosynthetic Photon Flux Density (PPFD) of 150 to 220 µmol/m²/s on an automated 14 to 16-hour daily photoperiod.
- Air Circulation: Position an oscillating clip fan or inline duct fan to create a gentle, continuous 0.5 m/s breeze across the rack. Air movement hardens stems, evaporates residual moisture on foliage, and eliminates microclimates where fungal spores propagate.
- Bottom-Watering Protocol: Never overhead water sunflower microgreens once uncovered; water droplets trapped between stems cause rapid mold blooms. Place the perforated tray into a solid (holeless) 1020 reservoir tray. Pour 500 to 750 ml of clean, dechlorinated water (pH adjusted between 6.0 and 6.5) into the bottom tray. Allow the substrate to pull water upward via capillary action for 15 to 20 minutes, then discard any standing water that remains unabsorbed. Repeat once every 24 hours based on ambient humidity.
Harvest timing, cut technique, and cold storage longevity
The optimal harvest window for sunflower microgreens spans day 8 to day 10 from initial soaking. Inspect the center junction between the two broad cotyledons daily. You must harvest before the tiny, jagged true leaves expand. Once true leaves develop past 2 millimeters in size, the stems turn fibrous, hollow, and develop a noticeably bitter, woody aftertaste.
Follow clean harvesting best practices:
- Pre-Harvest Dehydration: Cease watering 12 hours prior to harvest. Harvesting dry stems significantly prolongs post-harvest refrigeration shelf life and prevents bacterial slime.
- Clean Cut: Using a sharp, sanitized chef knife or microgreens harvesting shears, grasp a handful of greens gently by their upper stems and slice cleanly through the cluster 0.5 inch above the soil line. Avoid cutting into the soil or pulling root fibers into the harvested batch.
- Hull Removal: Gently brush the tops of the cut greens with clean hands to dislodge any remaining loose seed hulls.
- Packaging and Cold Storage: Place the dry greens into food-grade clamshell containers or airtight produce bags lined with a dry paper towel to absorb ambient transpiration. Seal and store immediately at 2 to 4°C (36 to 39°F). Properly harvested and chilled sunflower microgreens retain peak crispness and flavor for 10 to 14 days.
Troubleshooting hull retention, damping-off, and mold
Home and commercial growers occasionally encounter three common challenges with sunflower greens:
- Stubborn Seed Hulls: If hulls refuse to shed upon uncovering, relative humidity was too low during blackout or top weighting was insufficient. Remedy this by misting the canopy lightly with warm water and replacing an inverted empty tray over the greens for an additional 12 hours. The trapped humidity softens the shells, allowing the expanding cotyledons to pop free.
- Cobweb Mold vs. Root Hairs: True fungal mold (Botrytis or Rhizopus) forms spiderweb-like strands that climb up the stems into the aerial canopy, accompanied by a sour or musty odor. In contrast, beneficial root hairs (cilia) appear as a uniform, brilliant white halo strictly along the root zone beneath the soil line and instantly flatten upon touching water. Treat minor mold outbreaks immediately by spraying affected patches with 3% hydrogen peroxide.
- Leggy, Pale Stems: Stems that reach excessively tall, thin, and flop over indicate inadequate light intensity (PPFD below 100 µmol/m²/s) or an excessively long photoperiod under dim fixtures. Lower the LED light bars to 8 inches above the tray.
Recommended propagation equipment and next steps
Consistent, disease-free microgreen production depends on commercial-grade trays that do not warp or crack under stacked weights, combined with uniform LED lighting and clean water filtration.
Propagation Spec
Heavy-duty BPA-free shallow 1020 microgreen flats paired with full-spectrum 6500K horticultural LED bars provide superior root aeration, effortless bottom-watering, and uniform canopy density across multi-tier grow racks.
Advance your indoor growing skills by exploring our companion guides: master rapid brassica cultivation with our radish microgreens blackout and LED lighting protocol, protect your indoor harvests with our comprehensive guide on microgreens sanitation and mold prevention, and evaluate fixture specifications in how to choose grow lights for indoor gardening. For complete system overviews, visit the home microgreens hub and our gardening tools index.
Always disconnect main power sources—remove battery packs or unplug cords—before inspecting mower blades, clearing aeration tines, or handling sharp garden equipment. Keep hydroponic nutrient concentrates stored securely.
Practical guides curated by horticultural practitioners and yard care enthusiasts. Field-tested methods, verifiable steps, and zero automated fluff.
Frequently asked questions
Why are sunflower seed hulls stuck to the cotyledons?
Hulls stick when seeds lack humidity or top pressure during germination. Sowing under a 1kg to 2kg weight for 3 to 4 days forces roots down and pulls hulls off naturally. Gently misting hulls before light exposure softens stubborn shells.
Can sunflower microgreens be grown hydroponically without soil?
Yes. While potting soil and sterile coco coir provide the highest stem support and weight, food-grade jute or hemp mats work well when bottom-watered with a light 0.8 to 1.0 mS/cm mineral solution.
When is the exact time to harvest sunflower microgreens?
Harvest between day 8 and 10 when cotyledons are thick, dark green, and open, just before the first true leaves emerge. Once true leaves develop between the cotyledons, the stems turn fibrous and bitter.