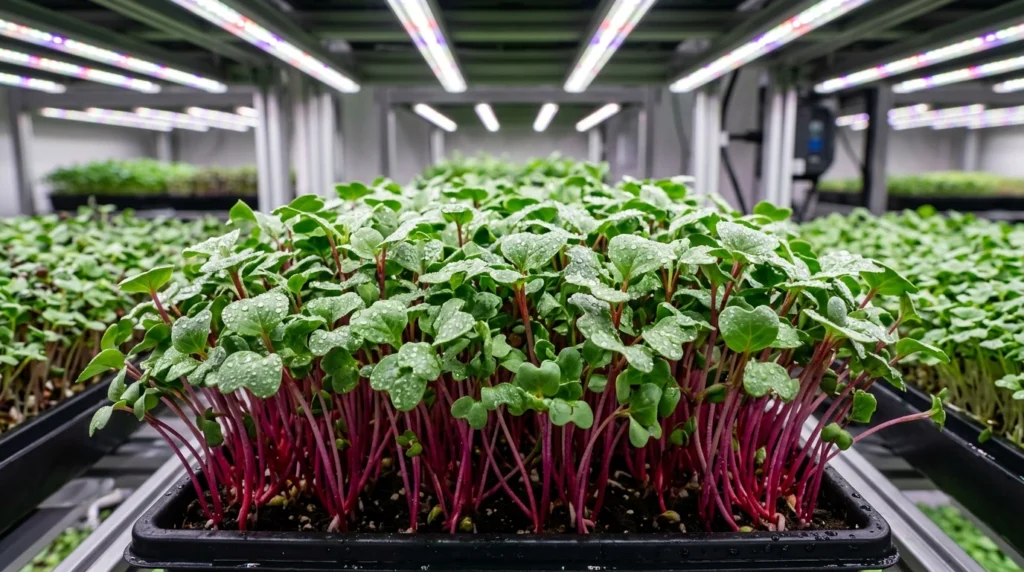
Recommended System: Commercial Microgreen Gear
Commercial BPA-free shallow propagation trays and full-spectrum LED rack systems for high-yield mold-free microgreens.
Radish cultivars: Rambo, China Rose, and Daikon flavor profiles
Radish microgreens (Raphanus sativus) are the fastest-growing and most reliable brassica crop in indoor urban farming. Offering an explosive, peppery punch that mirrors mature root radishes, they bring immediate culinary vibrancy, crisp texture, and intense visual color to gourmet dishes. Because radish seeds germinate in 24 to 48 hours and reach commercial maturity within 5 to 7 days, they represent the ideal high-turnover crop for home kitchen counters and commercial grow racks alike.
Growers typically select from three primary horticultural cultivars depending on market preference and aesthetic presentation:
| Radish variety | Stem and leaf pigmentation | Flavor profile | Average maturity window |
|---|---|---|---|
| Rambo Radish | Deep royal purple stems and purple-flecked cotyledons | Spicy, sharp, horseradish notes | 5 to 6 days |
| China Rose | Bright carnation-pink stems with deep emerald leaves | Medium peppery, crisp, slightly sweet | 6 to 7 days |
| Daikon (White) | Translucent white stems with bright lime-green leaves | Clean, intense, sharp radish heat | 5 to 6 days |
All varieties possess high levels of glucosinolates, isothiocyanates, vitamin C, folate, and potassium. Their rapid growth cycle requires minimal mineral nutrition, deriving nearly all cellular energy directly from endosperm reserves within the seed.
Direct sowing without soaking and optimal seeding density
Unlike large woody seeds like sunflowers or peas, radish seeds are small, spherical, and develop a delicate mucilaginous coating upon initial hydration. Never pre-soak radish seeds. Soaking radish seeds turns them into a gelatinous, clumped mass that impossible to distribute evenly across a flat, creating dense damp pockets that trigger damping-off disease.
Follow this precise direct-sowing procedure:
- Medium Preparation: Add 1 to 1.5 inches of finely sifted potting mix or pre-buffered coco coir into a shallow 1020 tray with drainage slits. Tamp the surface flat using an empty tray or wooden leveling board. Moistening the substrate thoroughly prior to seeding ensures even moisture capillary draw without pooling.
- Precise Seed Weighing: Weigh exactly 25 to 30 grams of clean, dry radish seeds on a digital kitchen scale. Sowing less than 25 grams produces a sparse canopy prone to falling over; exceeding 32 grams causes canopy crowding, stunted stem elongation, and mold outbreaks.
- Uniform Broadcast: Distribute the seeds across the substrate using a handheld seed shaker or clean fingers in a smooth figure-eight pattern. Ensure edge-to-edge coverage so the root matrix binds the entire substrate block evenly.
- Initial Hydration: Mist the sowed seeds generously with clean, dechlorinated water from a fine-mist trigger sprayer. The seeds should be moist but not floating or submerged in standing water.
The 3-day weighted blackout sequence and radical anchor roots
The blackout phase dictates stem caliper, root anchorage, and uniformity. While some beginner growers leave seeds loosely covered under plastic domes, top weighting produces substantially superior commercial yields.
Place an inverted solid 1020 tray directly over the sowed seeds so the plastic bottom contacts the seedbed. Place a 1kg to 1.5kg weight (such as a standard brick, two paving stones, or a filled one-liter container) in the center of the upper tray. This downward mechanical pressure simulates natural soil depth and accomplishes two vital botanical goals:
- Radical Root Penetration: The physical resistance forces the newly emerged radicle roots to push downward into the growing medium rather than curling along the surface.
- Uniform Stem Emergence: The top plate levels the micro-canopy, ensuring all seeds germinate at identical velocity and prevent early-sprouting seeds from crowding out late-germinating neighbors.
Maintain the stack in a dark room or germination closet at 20 to 22°C (68 to 72°F) for exactly 72 hours (3 full days). At the 48-hour mark, lift the top tray momentarily to inspect moisture; if the surface appears dry, apply a single light mist. By day 3, hundreds of pale, vigorous sprouts will visibly lift the 1kg weight by 1 to 2 inches, signaling readiness for light exposure.
Distinguishing benign microscopic root hairs from fungal mold
During the blackout phase, growers frequently mistake healthy root physiology for fungal contamination and unnecessarily discard productive crops. Understanding the physical distinction protects your harvests.
Within 48 to 72 hours of sowing, young radish taproots produce a dense halo of brilliant white, fuzz-like filaments. These are root hairs (cilia)—single-cell epidermal extensions engineered by the plant to maximize surface contact area and absorb water and dissolved minerals. Root hairs exhibit specific characteristics:
- They grow symmetrically and perpendicularly around the taproot itself, resembling a miniature white bottle brush.
- They remain strictly concentrated within the root layer along the soil surface.
- When sprayed with water, root hairs instantly collapse against the root and vanish from sight.
- They produce a clean, earthy, slightly peppery aroma.
In contrast, fungal mold (such as Pythium, Rhizopus, or Botrytis) forms irregular, tangled webs that climb upward along the stems into the aerial canopy. Mold webs do not disappear when misted with water, feel slimy to the touch, cause seedlings to collapse in mushy patches (damping off), and emit a distinct sour or mildew odor.
Transition to LED lights: PPFD, photoperiod, and anthocyanin color
On day 4, remove the blackout weight and top tray. The seedlings will appear bright yellow-white with tightly folded cotyledons. Move the tray immediately beneath horticultural LED grow lights.
Within 4 to 6 hours of light exposure, chlorophyll synthesis turns the cotyledons emerald green. For red and purple varieties like Rambo, high-intensity light triggers anthocyanin production, deepening stem and leaf color into rich burgundy:
- Daily Light Integral (DLI): Provide a target DLI of 14 to 16 mol/m²/d. This is calculated as PPFD (µmol/m²/s) × photoperiod hours × 0.0036.
- PPFD and Fixture Distance: Target a Photosynthetic Photon Flux Density of 120 to 180 µmol/m²/s measured across the entire canopy. Position linear LED light bars 8 to 10 inches directly above the tray surface.
- Photoperiod: Operate lights on a strictly automated 14 to 16-hour daily cycle using an electronic timer. Maintain a dark period of 8 to 10 hours nightly to permit normal carbohydrate metabolism and cellular respiration.
Bottom-watering schedule, humidity control, and ventilation
Once radish microgreens enter the light cycle, overhead spraying must cease entirely. Wetting dense foliage creates micro-stagnation pockets between succulent stems, promoting bacterial leaf rot and fungal damping-off.
Implement the bottom-watering protocol:
- Reservoir Setup: Nest your slotted 1020 grow tray inside a solid, leak-free 1020 watering flat.
- Water Volume: Pour 400 to 600 ml of clean, dechlorinated water directly into the lower reservoir. Ensure water temperature matches ambient room temperature (18 to 22°C / 64 to 72°F) to avoid shocking roots.
- Capillary Draw: Allow the tray to sit for 15 to 20 minutes. The root system will pull the moisture upward through the soil matrix via capillary pressure, leaving the top stems and cotyledons bone-dry.
- Drain Excess: Lift the upper tray and pour off any standing water remaining in the bottom reservoir. Leaving roots submerged in stagnant water suffocates aerobic root tissues and encourages Pythium root rot.
Simultaneously maintain grow room relative humidity between 40% and 50% with continuous horizontal air movement. An oscillating circulation fan set to deliver 0.5 m/s air velocity across the canopy maintains structural stem stiffness and prevents leaf condensation.
The 5 to 7-day harvest window and post-harvest washing
Radish microgreens reach peak culinary quality between day 5 and day 7 when stems stand 2 to 3 inches tall and cotyledons are fully unfurled, thick, and crisp. Do not delay harvest: once the first true leaves emerge from the central stem apex, stems become woody, tough, and overly astringent.
Harvest using clean protocols:
- Dry Harvest: Refrain from watering for 12 hours prior to harvest. Wet microgreens cannot be stored safely and decompose into sludge within days.
- Cutting Technique: Hold the cluster upright by the foliage and cut cleanly 0.5 inch above the substrate with a sanitized knife or long-blade harvesting shears. Avoid harvesting down into the soil line to eliminate dirt contamination.
- Storage Longevity: Do not wash microgreens before storage. Place dry cut greens into rigid plastic clamshells lined with unbleached paper towels to manage residual humidity. Store at 2 to 4°C (36 to 39°F). Properly stored radish microgreens remain crisp and spicy for 12 to 14 days. Wash gently in cold water immediately before culinary service.
Recommended grow equipment and companion crops
Achieving predictable 6-day crop turns requires durable commercial propagation flats that withstand heavy stacking, alongside balanced horticultural lighting.
Lighting & Rack Setup
Commercial-grade extra-thick 1020 trays with precision bottom drainage channels paired with low-profile full-spectrum LED bars deliver uniform photoperiods and zero-flex stability during weighted blackout stacking.
Continue your indoor agronomy education by exploring our companion guides: cultivate heavy-yielding nutty greens with our sunflower microgreens complete grow guide, master sanitation protocols in microgreens sanitation and mold prevention, and optimize photon efficiency in our grow light selection guide. Visit the main home microgreens hub for additional species profiles, and check the tools hub for precision digital scales and harvesting shears.
Always disconnect main power sources—remove battery packs or unplug cords—before inspecting mower blades, clearing aeration tines, or handling sharp garden equipment. Keep hydroponic nutrient concentrates stored securely.
Practical guides curated by horticultural practitioners and yard care enthusiasts. Field-tested methods, verifiable steps, and zero automated fluff.
Frequently asked questions
Are the white fuzzy growths on radish roots mold or root hairs?
In 95% of cases, white fuzz on young radish roots consists of microscopic root hairs (cilia) that maximize water uptake. Root hairs cling tightly to individual roots and disappear upon watering, whereas fungal mold forms a web across multiple stems and smells sour.
Why do radish microgreens need weighted blackout?
Placing 1kg to 2kg of weight on top of the blackout tray forces radical roots to anchor deep into the media and encourages thick, uniform stem elongation. Stacking creates an even canopy and prevents seed displacement.
How much light do radish microgreens need after blackout?
Provide 14 to 16 hours of full-spectrum LED light per day at a PPFD of 120 to 180 µmol/m²/s, yielding a Daily Light Integral (DLI) of 14 to 16 mol/m²/d. Intense light deepens anthocyanin coloration in purple and red varieties.