Recommended System: Anthbot US
Wire-free centimeter-level RTK satellite navigation, dual cutting discs, and intelligent slope climbing up to 45% grade for residential turf.
Affiliate disclosure: We may earn a commission from a partner link to Anthbot at no extra cost to you. Editorial opinions stay independent. No paid score.
Key factors when choosing a home hydroponic setup
Selecting an indoor hydroponic system begins with defining your primary goal: are you seeking a stylish culinary herb accent for a kitchen countertop, or an ongoing harvest of weekly salad greens and fruiting vegetables? Beginner-friendly systems differ significantly in footprint, noise level, reservoir capacity, consumable dependencies, and ease of cleaning.
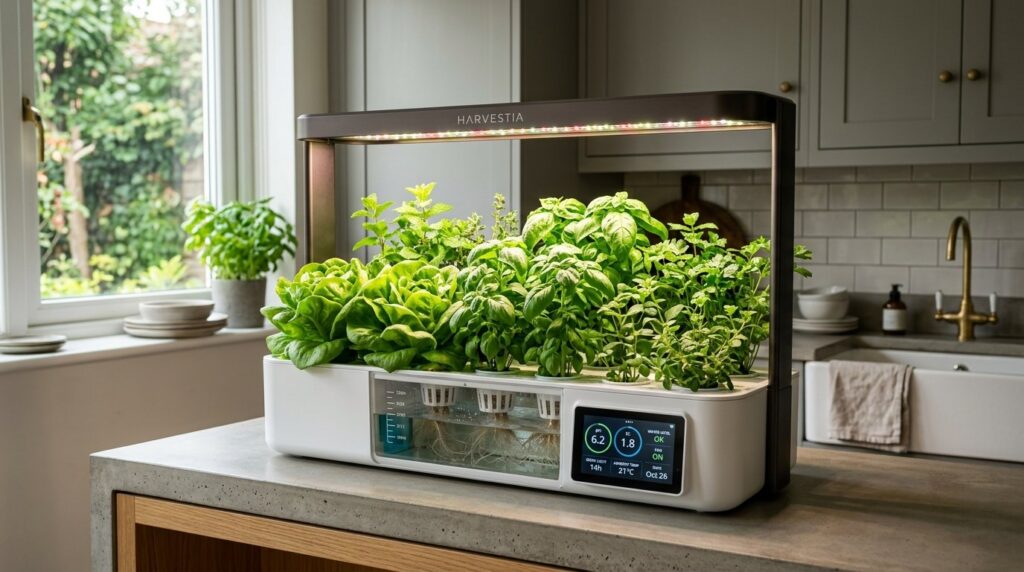
All-in-one smart gardens integrate the nutrient tank, circulation pump or aerator, full-spectrum LED light bar, and electronic water level sensor into a single self-contained housing. They operate nearly silently, require minimal assembly, and prevent spills in living areas. However, their fixed light height and small root chambers limit plant size to dwarf herbs, lettuce, and microgreens.
In contrast, modular Deep Water Culture (DWC) systems, vertical aeroponic towers, and flood-and-drain kits provide expansive root space and high-output lighting capable of supporting heavy crops like kale, rainbow chard, cucumbers, and cherry tomatoes. Evaluating your available physical space, household lighting requirements, and weekly maintenance routine ensures a system you will enjoy running for years.
Top beginner hydroponic formats compared
| System format | Typical plant sites | Ideal room location | Best crops to grow | Estimated weekly maintenance |
|---|---|---|---|---|
| Countertop Smart Garden | 3 to 9 pods | Kitchen counter, desk, credenza | Basil, mint, parsley, looseleaf lettuce, thyme | 5 to 10 minutes (top off water) |
| Vertical Grow Tower | 20 to 36 sites | Living room corner, sunroom, office | Spinach, kale, romaine heads, strawberries, peppers | 15 to 20 minutes (test pH, fill tank) |
| DWC Single-Bucket Kit | 1 to 4 net pots | Basement, utility room, grow tent | Large single tomato, bell pepper, giant basil bush | 10 to 15 minutes (monitor EC, top off) |
| Multi-Tier Shelf Rack | 12 to 24 heads | Spare bedroom, garage, basement wall | Continuous microgreens, cut-and-come-again greens | 20 to 30 minutes (seed trays, rinse tanks) |
Countertop smart gardens vs. vertical garden towers
Countertop smart garden appliances remain the most popular entry point for beginners. Brands such as AeroGarden, Click & Grow, and Rise Garden Personal fit neatly beside kitchen appliances. They feature automated light cycles that switch on and off without human intervention, along with floating water-level indicators or app notifications when the reservoir drops low. Because their root chambers are compact, they require water refills every 3 to 7 days once plants reach maturity. When buying a countertop unit, look for models with adjustable light arms that extend at least 12 to 18 inches above the deck to prevent fast-growing herbs from scorching their upper foliage against the LED diodes.
Vertical garden towers maximize indoor square footage by growing upward rather than outward. A circular vertical column holding 20 to 30 plant sites occupies only 2 to 3 square feet of floor space. An internal submersible pump lifts nutrient solution from a 10 to 20-gallon base reservoir to the top of the column, letting the water cascade over suspended net pots before draining back down. Vertical towers produce abundant harvests capable of providing multiple weekly salads for a family. However, consider pump sound: the continuous trickling sound of cascading water is soothing to some homeowners but may be noticeable in quiet bedrooms or media areas.
Deep Water Culture (DWC) bucket systems
Deep Water Culture represents the purest and most cost-effective hydroponic technique. A standard DWC starter kit consists of a 5-gallon food-grade opaque bucket, a heavy-duty net pot lid, an aquarium air pump, flexible silicone airline tubing, an airstone, and clay pebbles. The plant sits in a rockwool plug supported by clay pebbles within the net pot, while its root system extends directly into the oxygenated nutrient solution below.
Because a 5-gallon bucket holds 3 to 4 gallons of solution, DWC systems offer massive buffer capacity. Water temperature and pH swing much slower in a large volume of liquid than in a small countertop tray, making DWC remarkably forgiving for new growers. DWC is especially suited for growing massive single plants—such as a single indeterminate cherry tomato or a sprawling bell pepper plant—that would quickly choke smaller consumer units.
Calculating total cost of ownership and consumables
The upfront hardware purchase is only part of the investment. Many consumer smart garden brands utilize proprietary seed pod cartridges and specialized sponge plugs that cost $2 to $5 per planting. Over a full year of continuous harvesting, proprietary refill kits can exceed the original cost of the machine.
Savvy growers quickly transition to universal consumables: bulk horticultural rockwool starter plugs, reusable plastic net cups, bulk non-GMO vegetable seeds, and concentrated water-soluble dry or liquid hydroponic nutrient formulations. A standard 1-kilogram bag of dry hydroponic mineral salts costs approximately $20 to $30 and provides enough balanced nutrient solution to operate a typical home garden for over two years. Factor in electricity consumption: high-efficiency 30W to 60W LED fixtures typically add less than $2 to $4 per month to household electric bills.
Step-by-step beginner setup checklist
- Choose a stable, level location: Place your system near a grounded electrical outlet, away from direct heating vents, cold drafty entryways, and curious household pets.
- Fill with clean, dechlorinated water: Fill the reservoir to the indicated fill line. If using municipal tap water with strong chlorine, let it sit uncovered for 24 hours or use a basic carbon filter.
- Mix balanced hydroponic nutrients: Measure and dissolve the manufacturer’s recommended vegetative-stage nutrient dose into the water before dropping in seeds or seedlings.
- Verify water chemistry: Use an electronic tester to ensure pH sits between 5.5 and 6.5. Adjust with a few drops of pH Down if necessary.
- Sow seeds in starter plugs: Insert 2 to 3 seeds per pod, cover with humidity germination domes until sprouts emerge, and set the automated LED timer to run for 14 to 16 hours daily.
Next steps for indoor growing
Once your beginner hydroponic unit is established, optimize your yields by understanding how to choose LED grow lights for indoor gardening and mastering pH and nutrient management. Explore the complete indoor hydroponics hub for advanced environmental controls, and visit the tools hub for precision measuring instruments and harvest snips.
Cons / limitations
Product-specific limitations for this job — not a generic “UI changes weekly” list:
- NFT film dries in a power cut: A thin gully has minutes of buffer. DWC with air stones fails slower. Beginners who travel weekends should not start on NFT.
- Reservoir hiding root rot: Opaque totes help block light, but they also hide slime until plants wilt. You still need a weekly root look.
- Kit pumps sized for photos: Underpowered air pumps in cheap DWC buckets leave warm, low-oxygen water. The “complete kit” is often the first upgrade.
Desk metrics (11 September 2026)
Desk method and documented ranges. We did not invent a Foxy Gardens test plot, yield, or timed field trial.
- USDA zone: Indoor kits are zone-agnostic. Outdoor hardening of hydro lettuce still follows USDA frost dates (desk check for USDA 5–7 in spring).
- Solution pH: Beginner target 5.8–6.2 pH for lettuce; stay inside 5.5–6.5 pH. 10 min with drops or a calibrated pen.
- Fertilizer dose: Start near 0.8–1.2 mS/cm for leafy kits, not a lawn 1.0 lb N rate. Bottle “full strength” is often too hot for seedlings.
- Desk duration: 18 min structured re-read of public USDA zone guidance, a soil pH kit procedure, and the fertilizer label math above.
Always disconnect main power sources—remove battery packs or unplug cords—before inspecting mower blades, clearing aeration tines, or handling sharp garden equipment. Keep hydroponic nutrient concentrates stored securely.
Practical guides curated by horticultural practitioners and yard care enthusiasts. Field-tested methods, verifiable steps, and zero automated fluff.
Frequently asked questions
Can a beginner start hydroponics without prior experience?
Yes. All-in-one countertop smart kits automate lighting, water level monitoring, and nutrient reminders, making initial herb and salad growing very accessible.
Are hydroponic vegetables as nutritious as soil-grown vegetables?
Yes. When provided with a complete mineral nutrient solution containing all macro and micronutrients, hydroponically grown vegetables match or exceed the nutritional profile of soil crops.
How much electricity does an indoor hydroponic garden use?
Modern LED systems consume very little power, typically drawing 20W to 50W and adding approximately $2 to $4 per month to household electric bills.